Patio String Light Installation Tips
Patio string lights are one of the most popular choices for outdoor lighting. They are the perfect solution for creating a warm, cozy atmosphere in any outdoor space, including backyards, patios, walkways, and more. Complete setups can range from easy to difficult depending on how many string lights you need to hang. Whether you are stringing lights across your backyard or suspending them over tables at an outdoor cafe, here are some quick tips to make your installation as simple as possible.
Tip #1 - Plan Out Your Patio String Lights
Planning out your patio lights ahead of time is the most important part of the installation. It will save you a lot of time and effort in the long run, and help your installation go smoothly. During the planning stage, you should consider how you want your outdoor string lights to look, anchor point locations, and how many feet of lights you'll need.
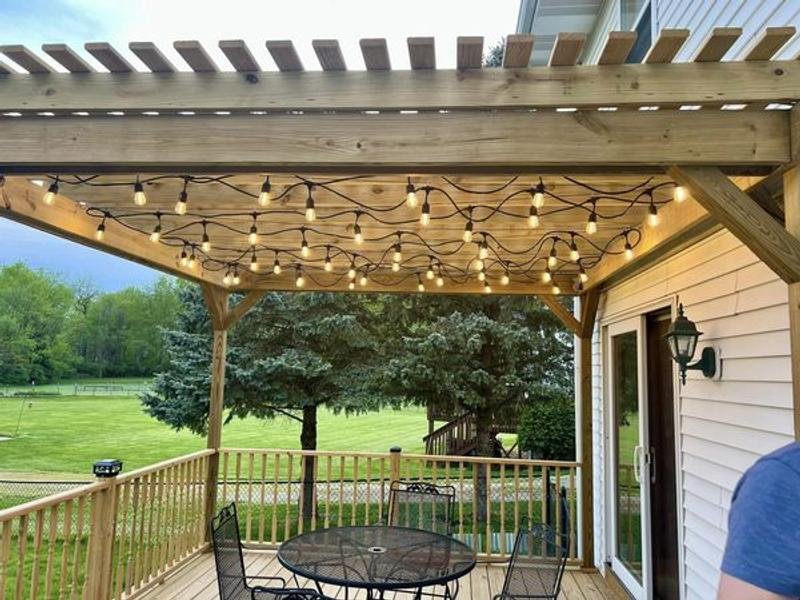
The appearance, or pattern, of your patio lights will not only set the overall difficulty of your installation, but also your anchor point locations. There are a variety of popular patio light patterns ranging from fairly simple to very complex. Some of the most common include:
Once you know what pattern you want, you can determine where the anchor points need to be. Next, measure the distance between each anchor point to determine how many feet of patio string lights you’ll need. Rough sketching is a good way to help visualize how your stings will look, as well as helping keep track of measurements.
Patio Lighting Tip: You should consider how long your outdoor string lights are going to be up. For the short term, standard patio lights will do as you don't necessarily need to worry about weather and other factors. But if you are planning on year-round use, you will need commercial grade patio string lights. These outdoor lights, such as PLT PremiumSpec's string lights, are made with SJTW wire gasketed sockets, ensuring they are weatherproof and will last for years to come.
Tip #2 – Choose Durable Anchor Point Locations
When choosing anchor points, make sure that surfaces or structures are durable enough to withstand having your lights attached. Longer runs of patio lights can be quite heavy, so you want to make sure that hooks or eyebolts won't pull out or break. Good anchor points include:
Trees
Walls
Fences
Railings
Poles
Building eaves
FAQ: How do you hang patio lights without drilling? Depending on where you want to hang you outdoor string lights, drilling for eyebolts and hooks might not always be feasible, especially if you need to attach your lights to decorative trim or deck railings. Removable adhesive hooks, zip-ties, and wire ties are all good alternatives.
Tip #3 - Attaching Stringers to Trees
Trees are one of the most common choices for anchor points due to convenience. If you are opting to mount your string lights to trees, there are a few ways to go about it. The best way is to attach the string lights directly to the trunk using a hook, eyebolt, or something simialr. This provides the most secure connection and helps prevent the bulbs from braking against the trunk or branches.
Another method is to wrap the lights around the trunk. This will work if the tree is skinny and there is enough spacing between the bulbs. We don't recommend doing this with wide trees as you will have bulbs laying directly on the tree itself.
Another popular method is to suspend the outdoor string lights directly from the branches. While it does create a beautiful look, we do not recommend doing this, especially if you are creating a permanent installation. The weight from the patio lights can cause the branches to droop and possibly even break during strong winds or storms. Bulbs can also be broken by swaying branches.
Tip #4 – Test Your Strings Before Hanging Them
Imagine you've just completed your patio lights installation. Much to your dismay, however, you've plugged them in for the first time and found that an entire section of lights is not working. How frustrating is that after all that hard work? This scenario can be easily avoided by testing all of your strings and bulb before installing them. Testing ensures that everything works the way it's supposed to and you won't end up with any last minute surprises.
Patio Lighting Tip: Always order extras of everything, whether its bulbs or stringers. That way you have extras on hand in case a bulb doesn't work, something gets damaged, or you accidentally cut a string too short.
Tip #5 - Use Guy Wires When Needed
Guy wires should always be used for long runs of patio lighting. These wires provide support to the patio lights and helps keep them from sagging over time. They also give your installation a more professional look too.
Many patio string lights have eyelets, making it easy to utilize a guy wire. Simple thread the wire through the eyelets before hanging. If your patio stringer doesn't have eyelets, you can still use a guy wire. You will need to hang the wire first, then attach the outdoor string lights using zip ties.
Tip #6 - Ideal Mounting Height
What is the ideal mounting height for outdoor string lights? Ideally, you want your lights high enough to properly illuminate your outdoor space, but no so high that there isn't enough light. You also don't want people to accidentally walk into them or bump into the bulbs.
In most instances, suspending your sting lights at least 8 to 10 feet off the ground allows for good clearance and visibility. Heavier bulbs can cause the your string lights to droop more, so adjust the height as needed to accommodate them.
Tip #7 - Use Shatter Resistant Bulbs
If your patio lights are going to be a permanent installation, installed near a pool or Jacuzzi, or you live in an area prone to severe storms, we strongly recommend using shatter resistant bulbs. The bulbs have a plastic envelope that will not shatter on impact, so you won't have to clean up glass shards.
Patio Lighting Tip: One of our most popular shatter resistant bulbs is the PLTS-12106. This antique LED S14 bulbs features a single visible filament and delivers 120 lumens of soft white (2700K) light.
Bonus: Outdoor Lighting Inspiration
Need some inspiration for our outdoor string lights? Here are some excellent examples of patio string light setups, including actual installation photos from our customers:
Patio Lighting Tip: Want to see how PLT's patio string lights compare to similar product from other brands? Read our Ultimate Patio Light String Showdown blog series.
Ready to install your patio lights? From residential stringers to high-quality commercial stringers, we have the perfect lights for you. Speak with one of our lighting experts today at 855-948-5079 or visit us online at 1000Bulbs.com.


