
Understanding Lighting Layout Plans: A Complete Beginner's Guide
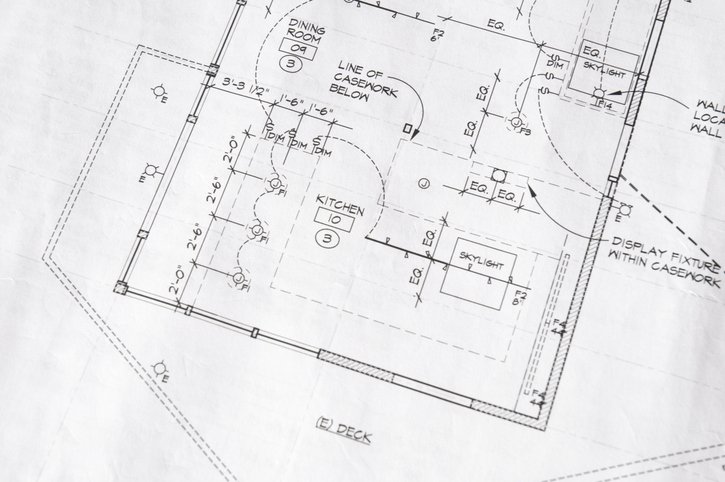
You're staring at a floor plan covered in circles, rectangles, and cryptic lines connecting them to little "S" marks on the walls. None of it makes sense yet, but it will.
A lighting layout plan is a technical drawing that maps exactly where light fixtures, switches, and circuits go in a space. This guide walks through what these plans include, how to read them, and how to create one yourself, whether you're planning a single room or an entire building.
A lighting layout plan is a technical drawing that shows the exact placement of light fixtures, switches, and circuits within a space. It maps fixture locations, fixture types, controls, and key installation notes so homeowners, designers, contractors, and electricians can coordinate the lighting before any work begins.
Rather than simply showing where lights go, a lighting layout plan serves as a communication tool for everyone involved in the project. It helps ensure that lighting design, fixture selection, switching, and installation are aligned before materials are purchased or construction begins, reducing the likelihood of costly changes later.
What Is a Lighting Layout Plan?
Think of a lighting layout plan as a roadmap for your electrician. It tells them exactly where each fixture goes, which switch controls it, and how the wiring connects back to the breaker panel. Without one, you're asking someone to wire your home based on guesswork.
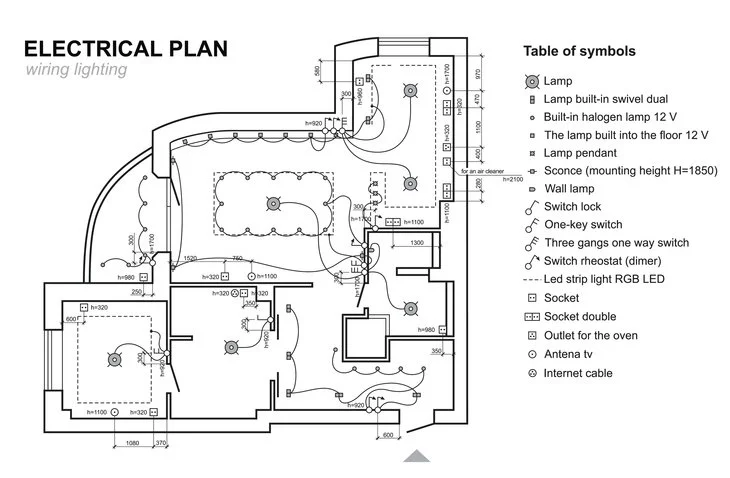
The plan itself is usually drawn on top of a floor plan. You'll see symbols marking each light location, lines connecting fixtures to switches, and notes about mounting heights or special requirements. A legend on the side explains what each symbol means.
Lighting layout plans are used for projects of all sizes, from replacing fixtures in a single room to designing the lighting for an entire home, office, retail store, warehouse, or restaurant. While commercial plans often include more technical information, the overall goal remains the same: create a clear installation roadmap that everyone can follow.
Why a Lighting Layout Plan Matters
Here's the thing about electrical work: changes get expensive fast. Moving a recessed light six inches after drywall goes up means patching, repainting, and paying for extra labor. A plan catches those problems when fixes still cost nothing.
Beyond avoiding mistakes, a layout plan helps you verify that your space will actually get the light it needs. You can check that work surfaces have task lighting, that ambient fixtures provide even coverage, and that accent lights hit the features you care about.
A thoughtful lighting layout also coordinates fixture placement with furniture, architectural details, natural daylight, and available electrical capacity. Planning these elements together helps prevent awkward fixture locations, overloaded circuits, and unnecessary rewiring once construction is underway.
Prevents dark spots and glare: Proper placement ensures even illumination across the room
Reduces installation errors: Electricians work from clear specs rather than verbal instructions
Controls energy costs: Selecting the right fixtures avoids over-lighting
Supports future changes: Documented plans simplify upgrades or repairs years later
What Is Included in a Lighting Layout Plan?
Every lighting layout plan has a few standard parts. Once you know what to look for, reading one becomes straightforward.
Fixture symbols and locations: Standardized icons mark where each light goes on the floor plan
Switch and control placement: Marks indicate wall switches, dimmers, motion sensors, and other controls
Circuit assignments: Lines or notations show which fixtures connect to which breaker
Fixture schedule: A table listing fixture types, wattages, lamp specs, and quantities
Notes and dimensions: Mounting heights, spacing measurements, and special instructions
The fixture schedule is particularly useful. It connects each symbol on the drawing to a specific product, so there's no confusion about what gets installed where.
On larger residential or commercial projects, the fixture schedule may also include manufacturer model numbers, lumen output, color temperature, beam angle, voltage requirements, mounting methods, and location ratings. These details help ensure the correct fixtures are ordered and installed while making future maintenance and replacements much easier.
A typical lighting layout plan may also include a legend that defines every symbol used on the drawing. This allows contractors, electricians, designers, and homeowners to interpret the plan consistently, even if they were not involved in creating it.
Lighting Layout Plan Vs Reflected Ceiling Plan
You might hear the term "reflected ceiling plan" and wonder how it differs. A reflected ceiling plan (often called an RCP) shows the ceiling as if you were looking down at a mirror on the floor. It displays everything attached to or recessed into the ceiling, including HVAC diffusers, soffits, and ceiling materials.
A lighting layout plan focuses specifically on fixtures, switching, and controls. It answers "where do the lights go and how are they controlled?" while an RCP answers "what does the entire ceiling look like?"
| Feature | Lighting Layout Plan | Reflected Ceiling Plan |
|---|---|---|
| Primary focus | Fixture placement and controls | All ceiling elements |
| Typically shows | Lights, switches, circuits | HVAC diffusers, soffits, ceiling materials |
| Primary users | Electricians, lighting designers | Architects, general contractors |
Professionals often combine both on a single drawing, but understanding the difference helps when you're reviewing plans or communicating with contractors.
The Three Layers of Light
Most professionally designed lighting plans rely on three distinct lighting layers. Instead of depending on a single ceiling fixture, layered lighting creates a space that is more functional, visually balanced, and adaptable throughout the day. Every fixture on your lighting layout plan should serve one of these three purposes.
You can learn more in The Three Layers of Lighting Design Explained, but here's the quick version.
Ambient Lighting
Ambient lighting is the base layer. It provides overall illumination so you can walk through a room safely and see what's around you. Ceiling-mounted fixtures, recessed downlights, and LED panels typically handle ambient light.
On its own, ambient lighting tends to feel flat. That's why it works best as a foundation for the other two layers.
Task Lighting
Task lighting delivers focused light for specific activities. Reading, cooking, applying makeup, and working at a desk all require brighter, more directed illumination than ambient light provides.
Undercabinet lights in kitchens, desk lamps in offices, and vanity lights in bathrooms are common task lighting sources. The key is positioning fixtures to illuminate the work surface without casting shadows from your body or hands.
Accent Lighting
Accent lighting is directional light that highlights architectural features, artwork, or focal points. It adds visual interest and draws attention to specific elements in a room.
Track lights, wall sconces, and adjustable recessed fixtures often serve as accent lighting. Putting accent lights on separate switches gives you control over the mood.
When all three lighting layers work together, a room becomes more comfortable, flexible, and energy efficient. Rather than relying on one bright fixture to do everything, layered lighting allows you to illuminate only the areas you need while creating a more inviting space for everyday activities.

How to Create a Lighting Layout Plan
Creating your own plan follows a logical sequence. Each step builds on the previous one, so resist the urge to jump ahead to fixture selection before you've mapped out how the room will actually be used.
1. Draft the Floor Plan
Start with an accurate floor plan showing walls, doors, windows, and room dimensions. Graph paper works fine for simple DIY projects. Free software like SmartDraw or RoomSketcher can help if you prefer digital tools.
Accuracy matters here. If your dimensions are off, your fixture spacing calculations will be wrong too.
2. Map Room Functions and Furniture
Mark where major furniture will sit and identify how each area will be used. A reading chair needs different light than a TV viewing area. A dining table needs different light than a hallway.
This step often reveals conflicts. You might realize the only logical spot for the sofa puts it directly under where you planned a pendant light.
3. Define Your Light Zones
Light zones are areas controlled by a single switch or dimmer. Group fixtures by function and location for practical daily use.
For example, kitchen recessed lights might be one zone, undercabinet lights another, and pendant lights over the island a third. This gives you flexibility to use only the light you need at any given moment.
4. Place Fixtures For Each Layer
Add ambient fixtures first for general coverage. Then layer in task lighting based on the activities you mapped earlier. Finally, add accent lighting to highlight features worth emphasizing.
Use standard fixture symbols. A circle typically represents a ceiling fixture, a rectangle indicates a fluorescent or panel light, and an "S" marks a switch location.
5. Add Switches, Dimmers, and Circuits
Mark switch locations near room entries, typically on the latch side of doors. Assign fixtures to circuits based on electrical load capacity, and note which fixtures require dimmer-compatible wiring.
Rooms with multiple entrances benefit from three-way switches. These let you control the same lights from either location.
6. Review and Adjust the Plan
Walk through the space mentally or physically. Check for dark corners, potential glare on screens, and practical switch locations.
This review often catches issues like a switch that would end up behind an open door or a pendant that would hang in a traffic path. Adjust before finalizing.
How to Choose and Place Lighting Fixtures
The right fixture depends on ceiling height, room size, and which layer of light you're addressing.
Recessed Downlights and LED Panels
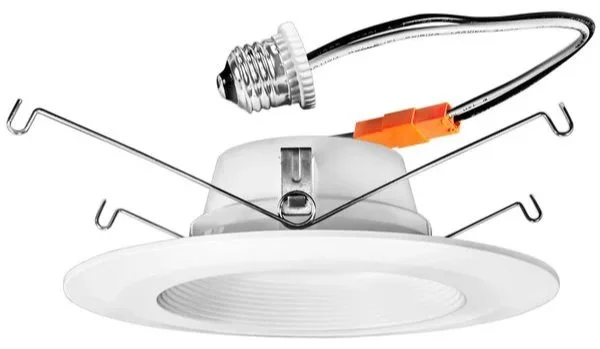
Recessed downlights work well for ambient lighting in rooms with standard or low ceilings. LED panels fit drop ceilings in offices and commercial spaces particularly well.
Spacing typically follows the rule of placing fixtures at intervals equal to half the ceiling height. An 8-foot ceiling suggests roughly 4-foot spacing, though beam angle affects this calculation.
Ceiling and Pendant Fixtures
Chandeliers and pendants serve as ambient light sources or decorative focal points. Placement matters for clearance, especially over tables and in walkways.
Over a dining table, the bottom of a pendant typically hangs 30–36 inches above the table surface. In a hallway, you want at least 7 feet of clearance below the fixture.
Wall Sconces and Undercabinet Lights
Sconces provide accent or ambient light without using ceiling space. They work well in hallways, bathrooms, and beside beds.
Undercabinet lights deliver task lighting for countertops. See more ideas in Spice Up Kitchen Lighting.
Floor and Table Lamps
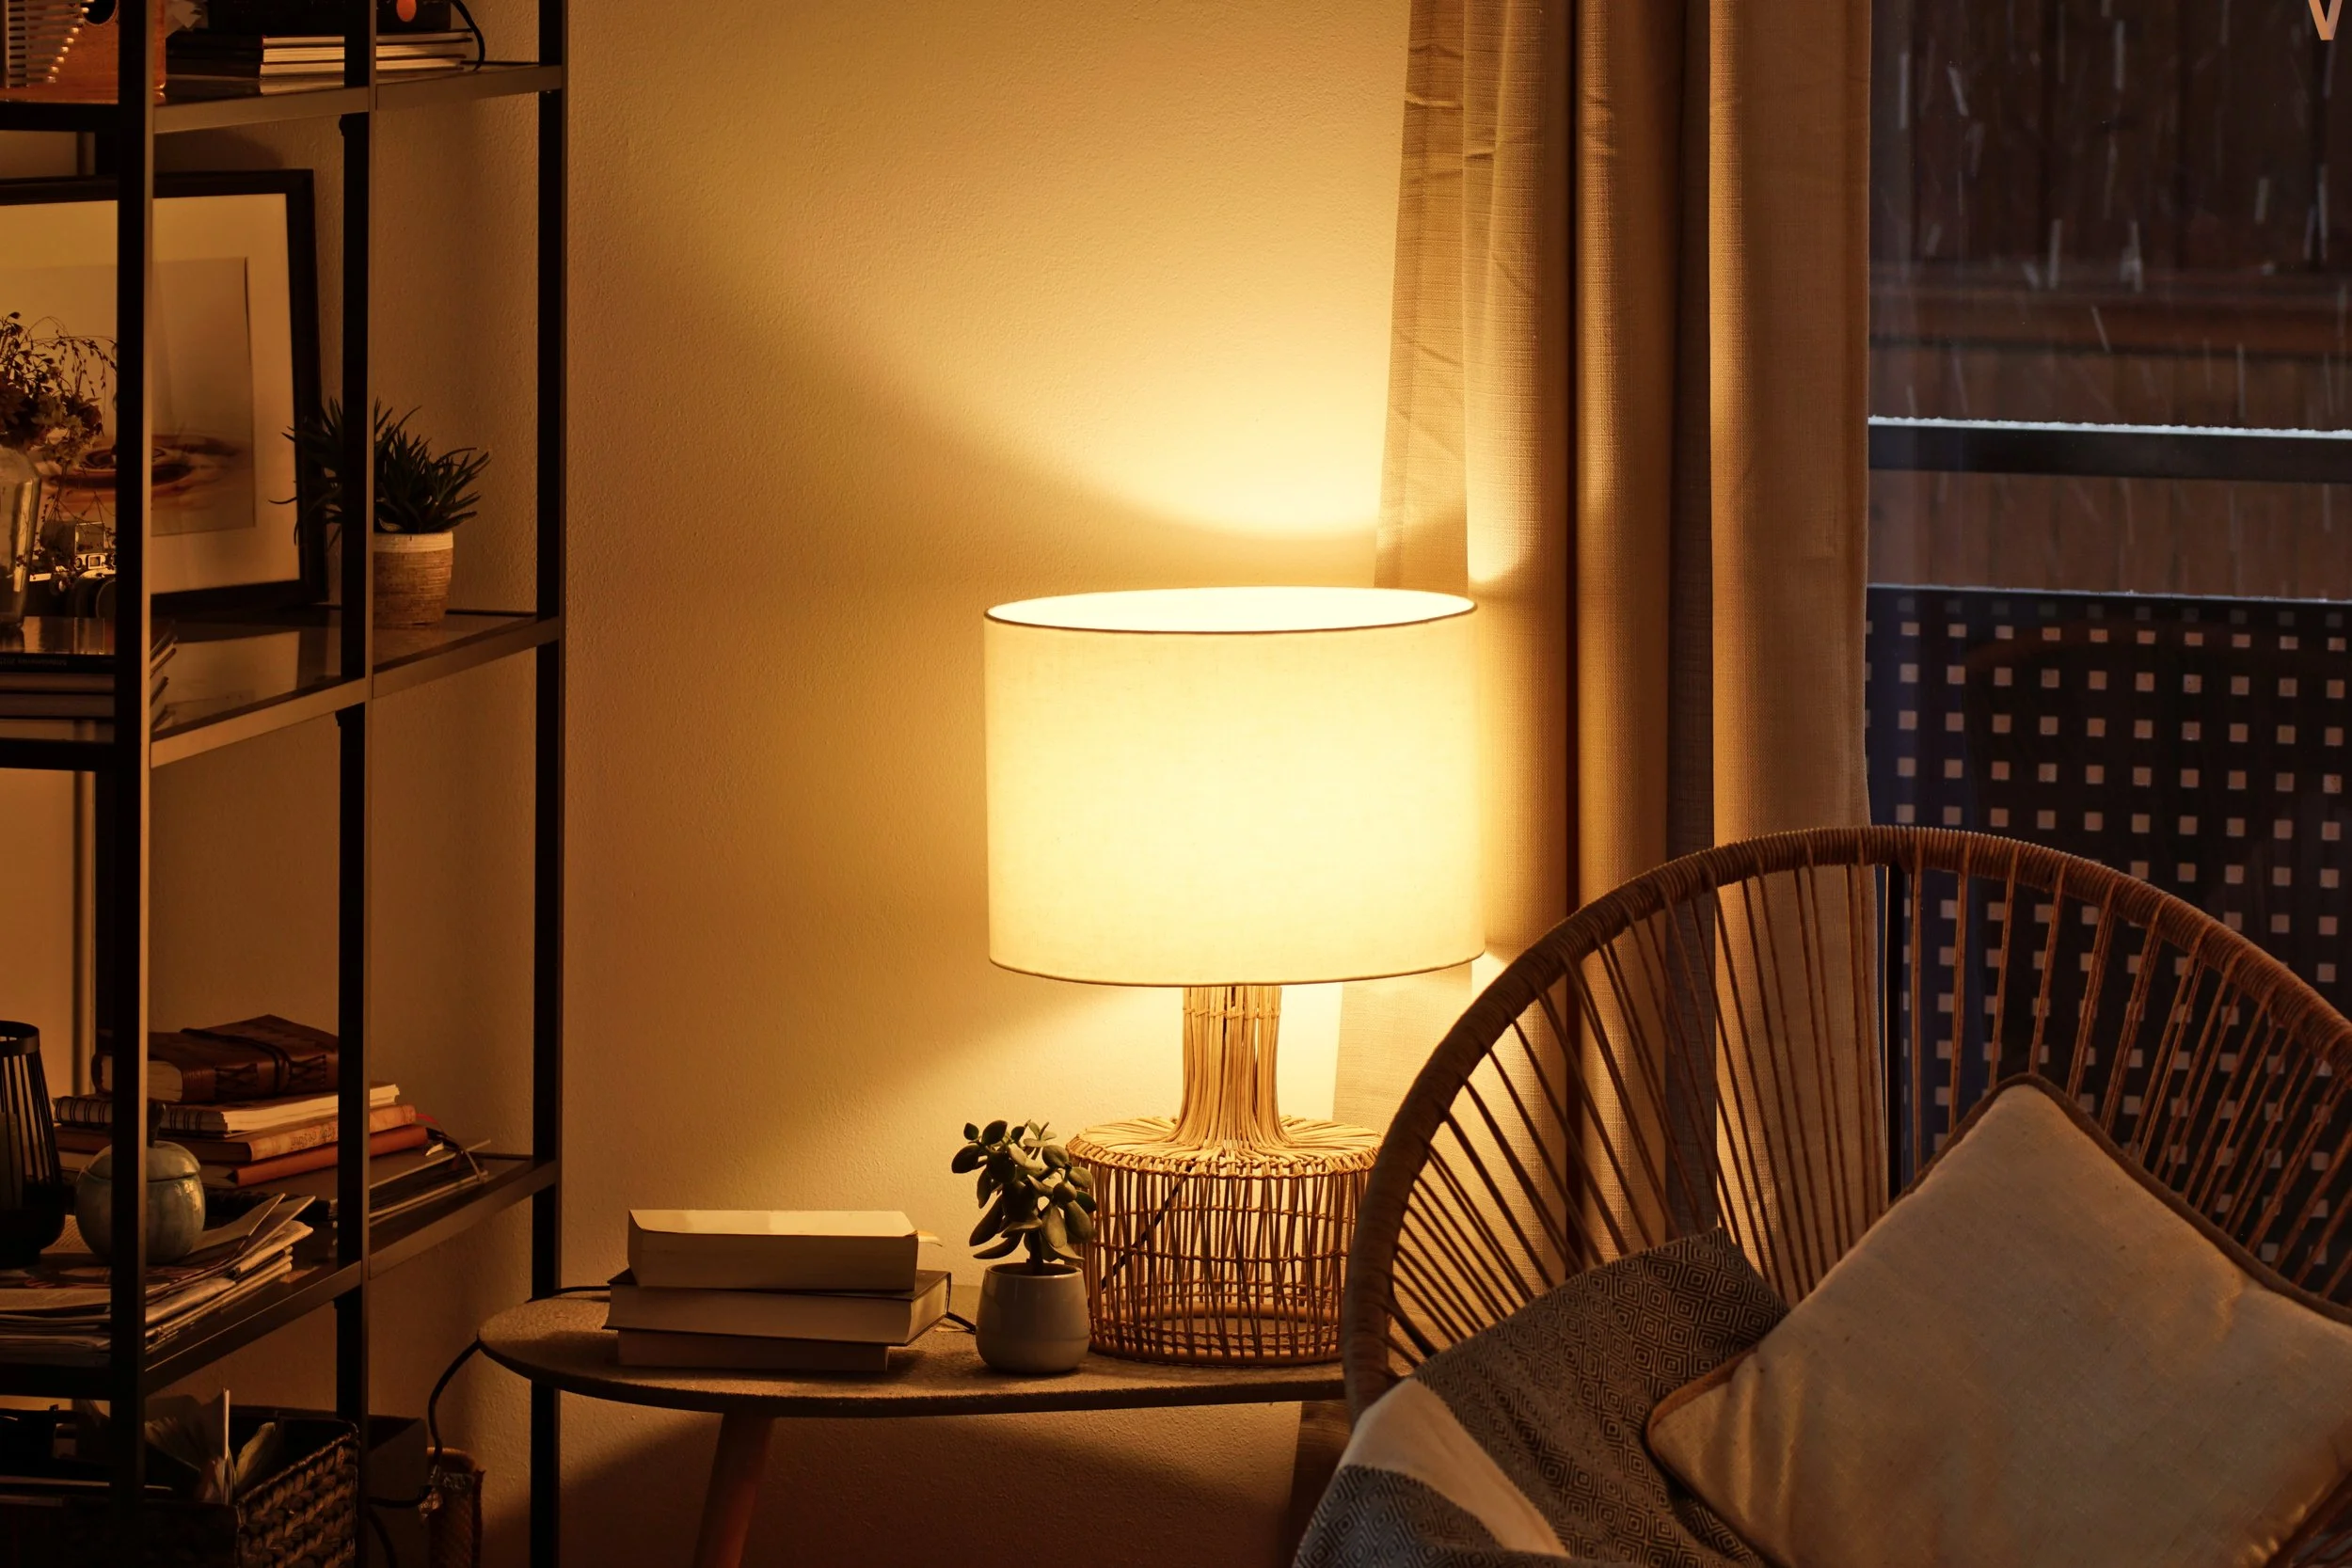
Portable fixtures add flexibility without hardwiring. Include outlet locations on your plan to support lamp placement where you need it.
Lamps often fill gaps that hardwired lighting can't address, especially in rental spaces or rooms where furniture arrangements change frequently.
Planning Switches, Dimmers, and Circuits
Switch placement affects daily usability more than most people realize. A switch in the wrong spot creates a minor annoyance you'll experience thousands of times.
Place switches at natural entry points: Typically on the latch side of doors
Use three-way switches for rooms with two or more entrances: This lets you control lights from either doorway
Group decorative and accent lights on separate switches: This gives you flexibility to adjust the mood
Verify dimmer compatibility with LED fixtures: Incompatible dimmers cause flickering
LED fixtures require compatible dimmers. Check the fixture manufacturer's dimmer compatibility list before finalizing your plan.
Lighting Layout Tips by Room
Lighting needs vary by room function. Here's how to apply the general principles to specific spaces.
Kitchen
Combine ambient ceiling lights with undercabinet task lighting over counters. Add pendant fixtures over islands for both task light and visual interest.
Position fixtures so they don't cast shadows on work surfaces. A single ceiling light in the center of the room often leaves the cook working in their own shadow.
Living Room
Layer ambient, task (reading lamps), and accent lighting with independent controls. Consider furniture arrangement and TV placement to avoid glare on screens.
A living room typically benefits from four or five light sources on different switches or dimmers.
Bedroom
Use dimmable ambient lighting and bedside task lights. Place switches near the bed and at the door so you can control lights without getting up.
Home Office
Position task lighting to avoid glare on screens. Supplement with ambient light to reduce eye strain from contrast between a bright screen and dark surroundings.
Common Lighting Layout Mistakes to Avoid
Beginners tend to make the same errors. Knowing what to watch for helps you avoid them.
Relying only on one overhead fixture: Creates flat light and shadows; layer multiple sources instead
Ignoring furniture placement: Fixtures planned without furniture in mind often light empty floor space
Skipping dimmers: Fixed lighting lacks flexibility for different activities and times of day
Placing switches in awkward locations: Switches behind door swings or far from entries frustrate daily use
Forgetting scale and ceiling height: Fixture size and spacing need to match room proportions
Build Your Lighting Layout Plan with 1000Bulbs.Com
Once your plan is complete, you'll need fixtures to bring it to life. 1000Bulbs.com stocks LED panels, recessed fixtures, undercabinet lights, and the full range of products referenced throughout this guide.
If you want help matching fixtures to your layout plan, call a Lighting Specialist. They can walk through your plan with you and recommend specific products that fit your specifications. Contact us at 1-800-624-4488 to get started.
FAQs About Lighting Layout Plans
What software can I use to draw a lighting layout plan?
Free options include SmartDraw, RoomSketcher, and graph paper for simple projects. Professional designers often use AutoCAD or Revit for detailed plans with precise measurements and layered information.
How many recessed lights does a room typically need?
Spacing depends on ceiling height and fixture beam angle. A common guideline places recessed lights at intervals equal to half the ceiling height, but consult fixture specifications for accurate coverage calculations.
What symbols are used on a lighting layout plan?
Standard symbols include circles for ceiling fixtures, rectangles for fluorescent or panel lights, and S-shaped marks for switches. Every plan includes a legend that defines each symbol used.
Can I create a lighting layout plan without hiring an electrician?
Yes, homeowners can draft a basic plan for simple projects. However, an electrician can review the plan for code compliance and handle all wiring and installation work.
How does color temperature affect a lighting layout plan?
Color temperature, measured in Kelvin, influences the mood of a space. The plan itself may note preferred color temperatures in the fixture schedule so warm or cool tones remain consistent throughout each room.