
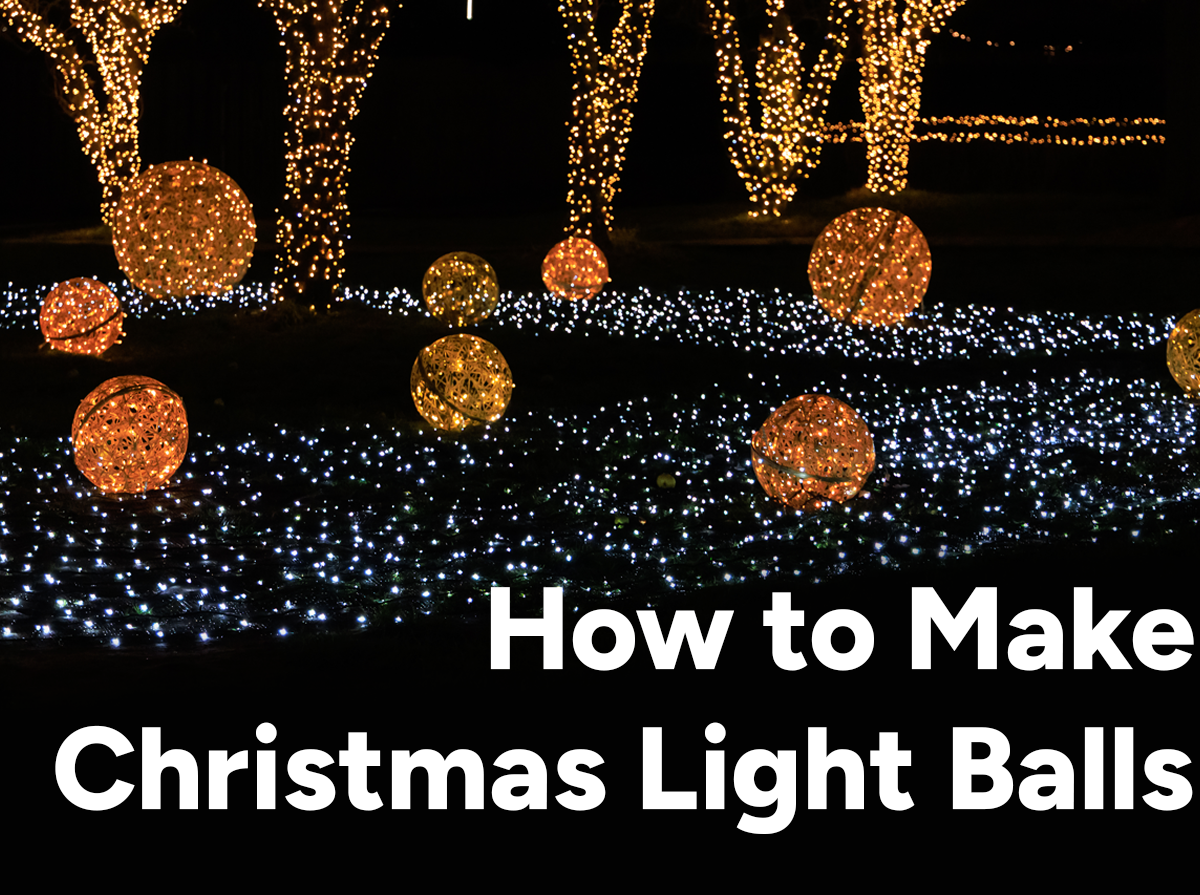
How to Make Christmas Light Balls for Your Yard This Season
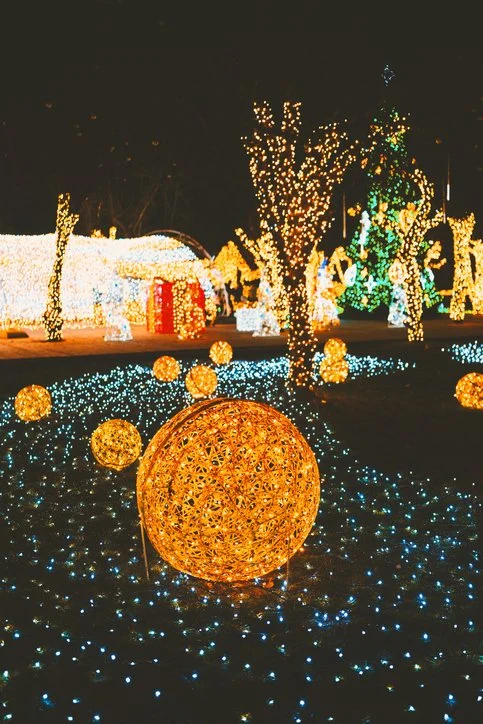
To make Christmas light balls for your yard, shape flexible chicken wire into a sphere, fold sharp edges inward, and wrap it evenly with outdoor-rated mini lights. Secure the strands without pinching their cords, position the balls away from foot traffic, and connect them through protected outdoor connections to a GFCI-protected power source.
The wire nearly disappears after dark, leaving glowing ornaments scattered through garden beds or tucked beneath trees. Warm white lights create a classic look; a few colorful spheres can make the yard feel playful. Build one ground-level ball first. Once you've worked out the shape and light coverage, you'll have a useful pattern for the rest of the display.
Lighting Tip: Prefer to skip the chicken wire? Use an outdoor-suitable grapevine sphere or two securely joined wire hanging baskets as your frame. A tomato cage can support a different ornament shape, but it usually needs modification to resemble a ball.
What You Need to Make Christmas Light Balls
You don't need a complicated frame to make DIY Christmas light balls, but gathering everything before you start will save you from stopping halfway through a sharp-edged wire project. Set out:
Flexible galvanized poultry netting, often called chicken wire
Outdoor-rated mini light strings
Outdoor-rated zip ties
Wire cutters and pliers
Work gloves suitable for handling sharp wire
Eye protection and a tape measure
An outdoor-rated extension cord suitable for the load and distance
Appropriate outdoor plug-connection protection
A compatible outdoor timer, if desired
Separate support line and hanging hardware, if you plan to hang the balls
Before cutting any wire, choose the display location and check the distance to your outdoor power source. That tells you how much cord reach you'll need and where to leave the plug end accessible. Test each light set now, then unplug it for construction.
Chicken Wire and Mesh Sizing
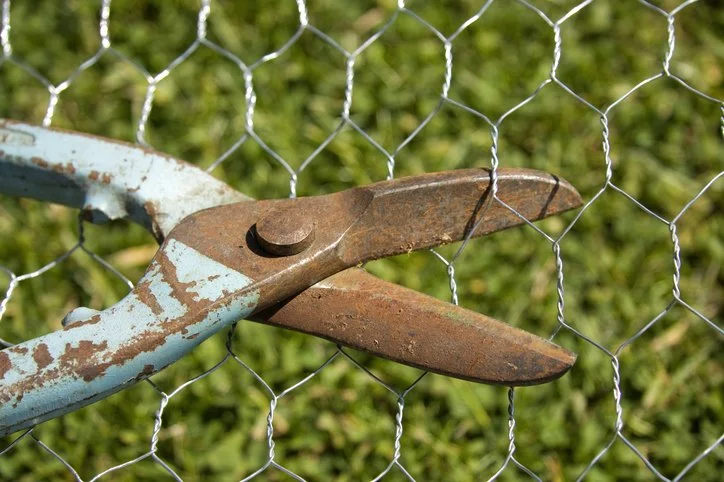
Choose poultry netting flexible enough to bend and gather by hand with tools. Twenty-gauge wire is one commonly sold example, but frame size and handling matter more than choosing one gauge for every project. Lower gauge numbers generally indicate thicker wire. Roughly 1-inch mesh provides more routing points than 2-inch mesh. However, the bulbs and sockets determine whether threading is practical. Rolls may come in widths such as 2 or 4 feet and lengths such as 25 or 50 feet; measure what you buy. Rigid welded hardware cloth is harder to gather and isn't interchangeable with flexible chicken wire for this method.
String Lights and Bulb Types
Mini bulbs and flexible string wires are easy to distribute around a compact frame. Check the size of the plugs and sockets, since they may not fit through the mesh even when the bulbs do. You can wrap the strand around the outside instead. 1000Bulbs carries mini lights and larger C7 and C9 options in its Christmas lights selection. C7 and C9 bulbs create larger points of light but need more room and suitable mounting. Choose mounting clips and stakes compatible with the bulb, socket, and intended surface; they do not replace separate support hardware for a hanging sphere. For this beginner project, mini strings are the simpler starting point. Verify outdoor use on the specific product.
Tools and Safety Gear
Set up on a clear work surface with your cutters, pliers, tape measure, and ties within reach. Wear eye protection and gloves intended for sharp-wire handling, especially when cutting or folding the mesh. Collect wire offcuts immediately and keep children and pets away from the workspace. Gloves help protect your hands from the frame; they do not make handling energized electrical components safe. Keep the lights unplugged whenever you adjust the wire or secure cords.
Choosing the Right Lights for Outdoor Light Balls
For your first outdoor Christmas light spheres, start by comparing outdoor-rated LED mini lights. A string that looks right in the package may leave wide gaps on a large frame, so check illuminated length and bulb spacing along with input wattage, plug lead length, and maximum connected sets. You'll use those details to plan both the finished look and the route to power.
LED vs Incandescent Mini Lights
LEDs generally use less electricity and produce less heat than comparable incandescent mini lights. They aren't heat-free, and lower heat output doesn't make damaged wiring or wet connections acceptable.
| Feature | LED Mini Lights | Incandescent Mini Lights |
|---|---|---|
| Heat Output | Typically lower; not heat free | Typically higher |
| Service Life | Generally longer; product-dependent | Generally shorter; product-dependent |
| Energy Use | Generally lower for a similar effect | Generally higher for a similar effect |
Outdoor service life also depends on construction, moisture exposure, handling, and storage. With either type, choose an outdoor-rated set with intact insulation and follow its connection limits. Browse LED mini light strings to compare the specifications for your planned display.

Warm White, Cool White, and Multi-color Options
Warm white lights give the balls a soft, classic appearance, while cool white creates a crisp, icy effect. Multi-color strings work well for a more playful yard display. Compare the lights with nearby decorations before buying several sets. White-light names vary by brand and product line, so product photos or an actual sample can help you avoid mismatched shades. Don't assume every warm white set looks identical.
How Many Lights Per Ball
There isn't one strand count that suits every ball. Larger frames and tighter coverage need more illuminated length, and doubling the diameter increases the surface area fourfold. Doubling your strands may not preserve the same coverage. Temporarily wrap one sphere, then view it from the sidewalk or street to spot gaps. Compare lit length and bulb spacing when adding lights, rather than relying only on the number of strings. Stay within the labeled maximum connected-set limit for every run.
How to Make a Christmas Light Ball Step by Step
The frame starts as a cylinder. Gathering its open ends gives you the rounded shape, and the lights follow once the sharp edges are tucked away. Keep the strands unplugged while you work, and take your time with the first ball so you can repeat the method for the others.
Step 1: Cut the Chicken Wire to Size
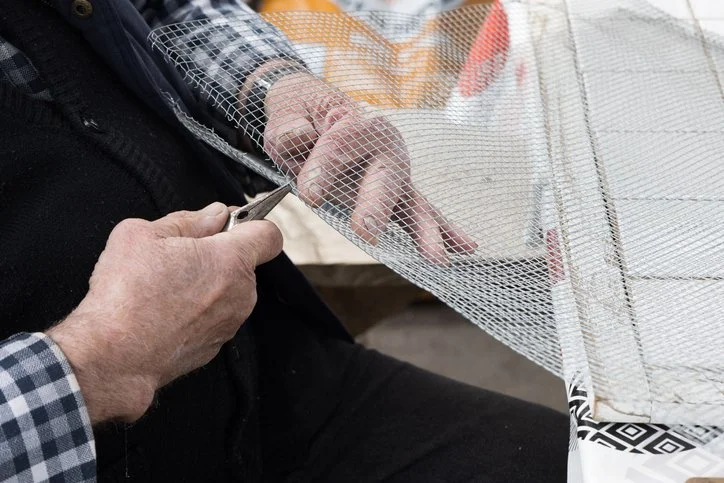
Unroll the mesh on your work surface and measure a rectangle about twice as long as the roll is wide. For example, a 2-foot-wide roll gives you a starting rectangle roughly 4 feet long. This is a shaping pattern, not a promise of a 2-foot finished ball. The two short edges will meet to make the cylinder seam. Allow a little material for overlap, mark your cut, and use wire cutters while wearing gloves and eye protection. Collect the small cut pieces before moving on.
Step 2: Roll the Wire Into a Cylinder
Bring the two short edges together and overlap them slightly to form an open-ended cylinder. Work along the join so the tube stays reasonably even rather than tapering sharply at one end. Fasten the seam at several points with outdoor-rated zip ties, or use pliers to bend cut wire ends around adjacent mesh. Turn protruding tips inward and check that the join doesn't spring open. The cylinder doesn't need its final rounded shape yet; you'll adjust that in the next step.
Step 3: Shape the Cylinder Into a Sphere
Gather one open end inward a little at a time, working around the opening instead of squeezing everything into one pointed bundle. Repeat at the opposite end, then rotate the frame and gently round the middle. If one side looks flat, redistribute nearby folds rather than pressing harder on the opposite side.
Step back and look at the frame from a few angles. You're aiming for a rounded shape, not a perfect geometric sphere, so a little irregularity is fine. Keep your gloves on, use pliers for stubborn folds, and tuck every sharp tip inward before bringing the lights near the frame.
Step 4: Weave the String Lights Through the Mesh
With the tested light set unplugged, position the plug end near the planned power route. Leave enough lead accessible to reach the connection without tension, then begin wrapping in evenly spaced bands. Change direction as needed to cover the whole sphere, passing small bulbs through the mesh only when they fit easily. If anything catches, wrap around the outside instead.
Hold the strand against smooth parts of the frame with a few loose outdoor-rated ties. The ties should keep it in place without pressing into the insulation, and the cord should follow gentle curves rather than sharp bends.
Before finishing, set the ball on a stable surface and briefly turn it on. Look at it from the distance where people will see the display; a gap that's hard to notice up close may stand out from the sidewalk. Unplug again before shifting any strands or adjusting ties.
Step 5: Secure the Seams and Tuck the Sharp Edges
Make one final pass around the ball with the lights unplugged. Check the cylinder seam, gathered ends, and tie points for wire tips that could rub against a cord. Support the frame while turning any remaining tips inward with pliers so the lights aren't pulled or crushed. If you find pinched, scraped, or cut insulation, replace the damaged set instead of covering it with tape.
Your chicken wire Christmas light balls are ready to move once the frame holds its shape and the cords sit clear of sharp edges. Carry each one by the frame, never by its electrical lead.
How to Display Christmas Light Balls in Your Yard
A cluster that looks good from the porch may disappear behind a shrub when you view it from the street. Before settling on a spot, check the display from both places and confirm that the ground is stable. The best Christmas light ball ideas also leave a practical route to power, with no cords crossing steps, driveways, or walkways.
Grouping and Clustering for Visual Impact
Try three or five balls in varied sizes for a relaxed garden cluster. Keep the colors consistent if you want the group to look coordinated with nearby roofline or tree lights. A single large sphere can also make a clear focal point. At a small-business entrance, a compact grouping beside the doorway can add interest while leaving the full accessible route open.
Placement Under Trees and Along Walkways
Garden beds, lawn areas beneath accessible trees, and the sides of an entryway give the balls room without putting them in the walking path. Position them within safe cord reach of protected outdoor power. Keep frames and cords clear of walkways, driveways, irrigation, and areas used by snow-removal equipment. If lightweight spheres need support, secure their frames with suitable supports without piercing, pinching, or pulling the electrical cords.
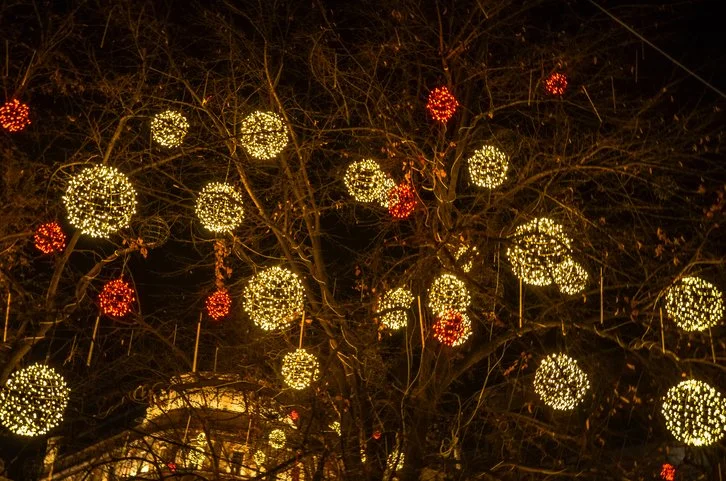
Hanging Light Balls From Branches
If you're deciding how to hang Christmas light balls, start with separate support hardware. Attach a suitable outdoor support line to the frame at multiple points, and check the completed ball's weight against the hardware rating. The branch also needs to be sound and strong enough for the load. Never suspend a sphere by its light string or extension cord. Keep installations reachable from the ground or use professional help, and stay away from overhead power lines. Leave cord slack and strain relief so movement doesn't pull on the plug.
How to Power and Weatherproof Your Light Balls Outdoors
An outdoor rating is only one part of protecting the display from weather. You'll also need a protected power source and connections positioned away from water and snow. Read the instructions for the lights, cords, timer, and covers together, because the least suitable component can limit the setup. These measures protect against the intended exposure; they don't make the display waterproof.

Outdoor Extension Cords and Timers
Use outdoor-rated extension cords and timers suited to the total load and conditions, supplied by a GFCI-protected outlet. A GFCI, or ground-fault circuit interrupter, helps protect against electric shock. Keep cords unpinched and away from traffic routes.
Follow each light set's maximum connected-set limit. Connecting strings end to end, also called daisy-chaining, doesn't permit an unlimited run, even with LEDs.
A compatible Christmas light timer can reduce unnecessary operating hours. Estimate electricity cost with this formula: total labeled watts ÷ 1,000 × operating hours × your electricity rate per kilowatt-hour. Follow product instructions for switching the display off before bed or leaving home.
Sealing Connections Against Rain and Snow
Protect plug connections with a purpose-designed outdoor connection enclosure compatible with the plugs and expected exposure. Install it according to its instructions, keep connections above puddles and accumulated snow, and use an appropriate outlet cover when a plug remains connected outdoors.

Tape and plastic bags are not substitutes for suitable connection protection. An enclosure doesn't make the lights or plugs submersible. Compare ratings when selecting extension cords and cord protectors.
If the GFCI trips or you notice moisture at a connection, stop using the display and disconnect power safely from a dry location. Never bypass the GFCI or repeatedly reset a wet setup.
Tips and Troubleshooting for DIY Light Balls
For these DIY outdoor Christmas decorations, treat an uneven shape differently from an electrical fault. Unplug before reshaping, checking bulbs, or adjusting ties, and investigate repeated flickering before using the lights again.
Keeping the Ball Shape Round
Flat or pointed areas: Rotate the frame and redistribute folds gradually, loosening overly tight joins as needed.
Difficult initial shaping: Temporary crumpled paper can help support an unpowered frame. Remove all stuffing before installing or testing lights.
A collapsing frame: Reinforce a weak seam, choose more suitable mesh, or make a smaller ball.
Fixing Dark or Flickering Bulbs
A dark section: Unplug the set and inspect plugs, user-replaceable bulbs, and labeled fuse access using the manufacturer's procedure and replacement ratings.
One failed LED: Check the set's instructions. Some circuits keep other lamps lit, and sealed lamps may not be replaceable. For serviceable sets, match LED replacement Christmas light bulbs to the manufacturer's specified bulb type and electrical ratings.
Persistent flickering or damage: Replace a strand with damaged insulation, a non-serviceable failure, or persistent faults. Don't bypass fuses, bridge sockets, or keep using a wet set.
Avoiding Sharp Wire Injuries
Wear gloves when carrying, reshaping, or storing the frame, and lift it without squeezing cords against the wire.
Recheck folded wire ends after wind, transport, and storage.
Keep finished spheres where children and pets cannot reach the sharp frame or pull on the lights.
How to Store Your Light Balls After the Season
Unplug the display before taking it down, clean the components as directed, and let the frame and lights dry completely. Store each ball in a dry, sheltered space where its shape won't be crushed. Loosely gather the leads and protect the plugs from snagging. An old sheet or loose protective cover can help prevent tangles, but don't seal a damp sphere inside a tarp or stack heavy items on top. Before reusing it next season, inspect the frame for corrosion, replace broken ties, and check the light strings for damaged insulation.
Build a Brighter Yard Display With 1000Bulbs.com
Start with one sphere, settle on the coverage you like, and use that prototype to plan the rest of your yard. Explore Christmas lighting at 1000Bulbs.com for mini lights, string lights, and project accessories, checking each product's outdoor rating. Choose lights that fit your frame size, color scheme, and power plan. For expert help, call 1-800-624-4488.
Frequently Asked Questions About DIY Christmas Light Balls
How can I make Christmas light balls at home without chicken wire?
Use an outdoor-suitable grapevine sphere or two securely joined wire hanging baskets as a frame. A tomato cage can support a different ornament shape, but it usually needs modification to resemble a ball.
How do you make large Christmas balls for outside?
Start with a larger chicken-wire rectangle and enough outdoor-rated light length for your desired coverage. Shape and secure the frame gradually, then check its stability and any separate hanging supports before putting it on display.
Are LED lights safe to use on chicken wire frames?
Outdoor-rated LED mini lights can work when installed as directed, with cords protected from sharp wire. Their lower heat output doesn't remove shock or fire hazards from damaged insulation, overloaded connections, or wet electrical components.
How long do homemade Christmas light balls last outdoors?
A maintained frame and suitable outdoor lights may be reused for multiple holiday seasons. Weather exposure, corrosion, handling, cord condition, and dry storage determine when the frame, ties, or light strings need replacement.
How do you hang Christmas light balls safely?
Support the frame at multiple points with suitable outdoor line and hardware rated for the completed ball's weight. Never hang it by its lights or power cord, and leave the electrical lead free of tension.
Can Christmas light balls stay outside in rain or snow?
Only leave them outside when the lights, cords, and accessories are rated for the exposure and installed as directed. Keep protected connections above water and accumulated snow, and disconnect the display if moisture or damage makes it unsafe.